You can directly set the camera time or set Network Time Protocol (NTP) parameters to time-synchronize the camera with the NTP server on the network.

Do not change the camera time during video recording. Otherwise, the video file may be corrupted.
For models that support 1 + N, after the system time and DST of the primary camera are changed, the setting is automatically synchronized to the secondary cameras. After the system time and DST of a secondary camera are changed, the setting is not synchronized to the primary camera.
Configuring the System Time
- Log in to the camera web system (https://Camera IP address).
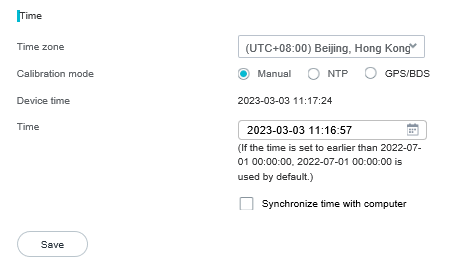
- Choose and configure the system time, as shown in Figure 4-78.
a. Select a time zone from the Time zone drop-down list box.
b. Select a time calibration mode and set related parameters. Table 4-33 describes the parameters.

- After NTP time calibration or GPS/BDS-based time calibration is set, protocol-based time calibration becomes invalid.
- To enable NTP time calibration, first ensure that Time zone is correctly set in manual time calibration mode.
- The following time calibration modes are available: manual, GPS/BDS, and NTP. In manual mode, you can directly set the time. In GPS/BDS mode, the time is calibrated through the GPS module of the camera. In NTP mode, you need to configure the NTP server to time-synchronize the camera with the NTP server.
Table 4-33 Time calibration modesParameter
Setting
Manual
- Click Manual.
- Click the Time text box.
The dialog box for setting the date and time is displayed.
- Set the date and time and click OK.
The system returns to the time setting page.
NOTE:To time-synchronize the camera with the computer, click Synchronize time with computer.
NTP
- Click NTP.
- Set the NTP server IP address or domain name as prompted. Set the interval for time-synchronizing the camera with the NTP server. Then the camera synchronizes time with the NTP server at the specified interval.NOTE:
- You can click
 to check whether the NTP server IP address is available.
- You can click
GPS/BDS
Only some models support this mode.
- Click GPS/BDS.
- Set the synchronization interval as required.
- The GPS module of the camera receives signals only and cannot transmit power. Currently, the camera system supports GPS and BeiDou positioning system (BDS). The corresponding signal frequency bands are as follows:
- GPS L1: 1575.42 ± 5 MHz
- BDS B1: 1561.098 ± 2.046 MHz
- When the camera is connected to the platform on which the NTP time calibration function is enabled, the platform will calibrate the camera time. In this case, the GPS/BDS time calibration function does not take effect.
- Click Save.
Configuring Daylight Saving Time
- Log in to the camera web system (https://Camera IP address).
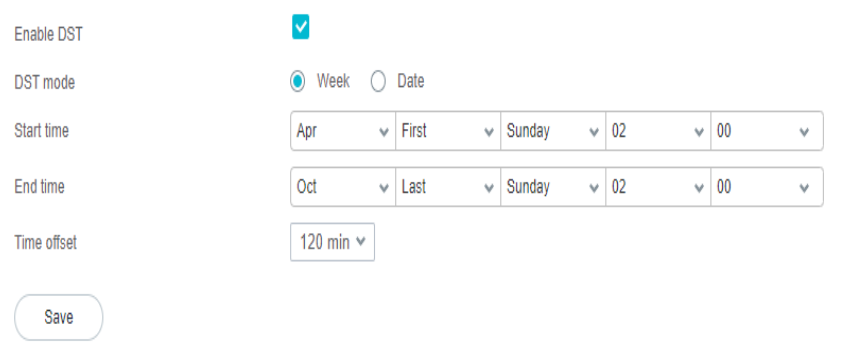
- Choose and configure the DST, as shown in Figure 4-79.
- Configure the DST.
- Select Enable DST.
- Select Week or Date as required. If neither option is selected, the DST settings cannot be saved.
The Week mode indicates that the DST is set by week. The Date mode indicates that the DST is set by date.
- Set Start time, End time, and Time offset of the DST based on regulations specified in the local laws.
Table 4-34 describes the DST parameters.
Table 4-34 Parameter descriptionParameter
Description
Week
Indicates that the DST is set by week.
Date
Indicates that the DST is set by date.
Start time
Time for enabling the DST.
End time
Time for disabling the DST.
Time offset
Lead time during the DST, in minutes. If this parameter is set to 30 min, the DST is 30 minutes earlier.
If the local laws regulate that DST must be used, you must set DST based on the regulations specified in the local laws.
- Click Save.